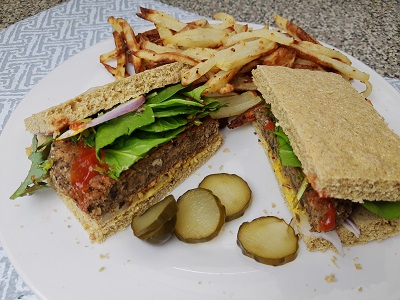
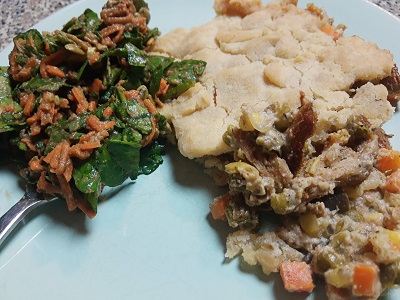
fbpx

Soy Curl Pot Pie

SoyCurlPotPie

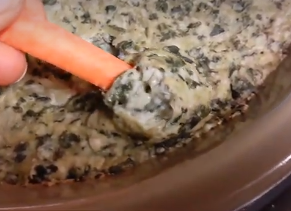
Looking for comfort food for the Fall season?

INGREDIENTS:

  • 1/2 bag of Butler Soy Curls

Re-hydrate the Soy Curls using the following:

Salt or liquid aminos
Poultry seasoning
Garlic powder
Onion powder

  • 1/2 cup of onions
  • 2-3 cloves of garlic
  • 1 tsp cornstarch
  • 1/2 bag of frozen vegetables
  • 1 pie crust or cornbread mix
  • Creamy Cashew Soup Base:

1/2 cup raw cashews (soaked if not using a high-speed blender)
1/2 cup water or broth or nut milk
1/2 tsp dried thyme
1/2 tsp salt
1/4 tsp fresh lemon juice
1 tsp corn starch

  • Pie crust –  Cornbread mix can be prepared and used to top the pie in place of a pie crust.

DIRECTIONS:

  1. Rehydrate soy curls and if you’d like you can fry in an air-fryer for 2 minutes or bake in the oven for 10 minutes to get some crispiness on those edges.
  2. Stir-steam 1/2 cup of onions adding seasoning/flavor along the way.
  3. Prepare the “Creamy Cashew Soup Base” by placing all of its ingredients into a blender. Add about 1 tsp of cornstarch at the end so that it will thicken as it cooks in the pan.
  4. Add vegetables, soy curls and soup base to the pan with the onions. Stir until thickened.
  5. Add the pot pie mixture to your baking pan. You may want to add a dab of oil to the baking dish before adding pot pie mixture.
  6. Bake in the oven for 20 – 30 minutes at 350 degrees Fahrenheit.
  7. Serve with a simple side salad.  One possibility may be spinach, carrots, nuts/seeds and an oil-free dressing.
  8. ENJOY!

Watch the video:


https://youtu.be/aN_TRsi-xHA

General Tso’s Soy Curls and Veggies

Here is a great way to enjoy dehydrated soy curls. The texture was very similar to chicken.  I was so surprised and pleased at the outcome of this dish. I’ve made it two weeks in a row, so far. Take a look below at this easy, delicious, and satisfying recipe. (Video below.)

I’m looking forward to trying dehydrated soy curls in another dish in the near future and I will be sure to share it with you if it’s as successful as this one.

Ingredients

Dehydrated Soy Curls (See notes below.)

Rice or noodles (for serving)

Vegetables of your choice, I used:

    • 2 cloves of garlic
    • 2 green onions
    • 1/2 yellow bell pepper
    • 1/2 red bell pepper
    • 8 ounces of frozen broccoli
    • Extra spices (optional)

For the marinade:

    • 3/4 cup warm water /veggie broth
    • 3 to 4 tbsp sweetener (agave, honey, date paste, etc.)
    • 1/4 cup low-sodium soy sauce (I used a gluten-free tamari sauce.)
    • 2 tsp sambal oelek chile paste  or sriracha or pepper flakes to taste (optional)
    • 2 tsp mirin rice wine (or any cooking wine)
    • 2 to 3 tbsp rice vinegar
    • 1.5 tsp toasted sesame oil
    • 2 tsp grated fresh ginger
    • 3 cloves minced garlic

1 TBS thickening agent such as cornstarch (look for NON-GMO), tapioca, or flour of your choice.

Directions

    1. Mix the marinade ingredients, add the soy curls, and mix to coat.
    2. Soak for 19 – 15 minutes, and stir 1/2 way through soaking time to make sure all the soy curls are covered.
    3. Options:  (1) You can remove the soy curls from the marinade and air-fry the soy curls at this point as recorded in the YouTube video below.  Or, (2) Pan-fry the soy curls using a small amount (1 tsp) of oil. Or, (3) Add the soy curls at the end just before serving.
    4. Remove the soy curls from the pan if you used the pan to brown them a bit.
    5. Stir-steam the garlic and onions until softened.
    6. Add bell peppers and cook for about 2 minutes.
    7. Add the frozen broccoli and cook until tender.
    8. Add thickening agent of your choice to the left-over marinade, add the soy curls and mix well to incorporate all of the flavors for about 2 minutes.
    9. This dish is now ready to serve.

Notes

  1.  I used Butler’s Dehydrated Soy Curls that I found on AMAZON (this is an affiliate link).
  2. If you don’t have any fresh vegetables on hand, you might enjoy a bag of frozen stir-fry vegetables.
  3. Looking for NON-GMO cornstarch? I do know that SPROUT’S carries their own brand. Otherwise, you might try this RUMFORD NON-GMO CornStarch on AMAZON (affiliate link).
  4. Try serving over brown rice or brown rice noodles.


https://youtu.be/V6iHvYBWfLY

Flavorful Greens for Any Dish

Greens on Grains

Ingredients:

  • My favorite greens – baby spinach, baby kale, and baby chard.  – I often buy Earthbound Organic Power Greens
  • No-salt seasoning (full of flavor without added salt)
  • Sea salt – optional (add a bit if needed, but you control the amount this way)
  • Bragg’s liquid aminos – It’s a soy sauce alternative, and it adds this great umami flavor to your dishes.

Directions:

  1. Start with 1/4 cup of water instead of oil and add to the pan. These greens will wilt easily.
  2. Add the greens to the pan along with the dehydrated vegetable mix and seasonings
  3. Continue stirring until nicely wilted and most of the water has evaporated.
  4. And as a finishing touch, I like to add Bragg’s liquid aminos.

Now pile on those greens inside of your vegetable bowls and on top of grains. Yum, yummy!

Chickpea Salad/Bowl with Tahini Dressing

chickpea bowl

This is the chickpea salad that I’ve had a few times this week. Sometimes with rice and sometimes just the chickpeas, salad greens, and dressing. I also made it a warm bowl by using chickpeas, veggie balls (IKEA), basmati rice, and collard greens. (I’ll have to add a photo of the bowl with collard greens later this week.)

So you can make it a cold salad or a warm bowl is what I’m hinting at.

Ingredients:
Chickpeas (cooked/seasoned)
Veggie Balls (Or even more chickpea falafel balls.)
Greens (Cold for a salad or cooked for a bowl.)
Rice

Optional add-ins: olives or dried beets (as shown in the photo)

Directions:
1. Place all ingredients in a bowl and serve with this Savory Tahini Dressing.

Savory Tahini Salad Dressing (Oil-Free)

tahini dressing

Hi, ya’ll. I’ve been using this savory tahini salad dressing over my meal bowls this week. And this week, I’ve been eating a lot of my favorite beans – chickpeas. And chickpeas just remind me of tahini because I used to get falafel wraps from this small Greek restaurant that served them with tahini dressing.

Now, this tahini dressing has some sweetness along with hints of savory flavors and there is no yogurt added. Most traditional tahini dressings are yogurt-based, so feel free to add plain plant-based yogurt to this recipe as well. Also, there are no added oils. The tahini dressing has enough of its own oil. (This is also why there is no need to add oil to hummus when using tahini. See my hummus recipe in this post.)

I usually make this in a small mason jar so that I can shake it up easily and pour it onto my salads/bowls.

Ingredients:
1/4 cup tahini
1/2 cup plant-based milk, plain
1/2 TBS liquid sweetener (Maple Syrup, Honey?)
1/2 tsp Liquid Aminos (or Soy Sauce)
1/2 to 1 tsp Sriracha sauce (or hot sauce) – if you like it a bit spicy and of course you can add more
1/4 tsp turmeric
1/4 tsp garlic granules
1/4 tsp cumin
juice from squeezing 1/4 of a lemon wedge

Directions:
1. Add all ingredients to a small jar (such as a mason jar) and shake.

Here is a link to the chickpea salad I’ve been enjoying this week.

Plant-Based Burgers

plant based burger

These plant-based burgers are not meant to mimic a meat-based burger, but they do make a delicious and satisfying alternative between two slices of bread (or lettuce). Plant-based burgers can be made using a variety of ingredients. Below is a template that you can follow to create your own one-of-a-kind burger patty. I think the must-haves include onions, bell peppers, garlic, and mushrooms. But whatever you create, don’t forget the most important part – the seasonings! Your favorite spices can be added for the best flavor to fit your own taste buds.

Ingredients:

  • 1/2 cup of bell peppers, onions, and mushrooms, lightly sautéedThis can be any combination that you choose up to about 1/2 cup of ingredients. I think these three make a great base of flavorings for any combination of burger mix you choose.
  • 1 cup of cooked grains – It’s best that the cooked grains are dry and separate, not mushy.
  • 1 1/2 cup of beans – Any bean of your choice or any mixture of beans up to 1 1/2 cups.
  • 1/4 to 1 cup of additional vegetables, finely chopped – I suggest cooking the harder veggies such as root vegetables, but the remaining (such as leafy greens) can be added when raw.
  • Choose 1 binding ingredient your binding ingredient to help hold the mixture together: 1 flax egg, 1 chia egg, or 1 tsp of psyllium husk powder (or 1 TBS psyllium husks)
  • Additional flavorings: Salt, pepper, and any of your favorite spices. Don’t be afraid of adding flavor!

Directions/Notes:

  1. Lightly sauté the bell peppers, onions, and mushrooms in water to avoid added oils.
  2. If using harder additional veggies such as carrots, or beets, it’s perfectly fine to cook those too.
  3. Puree or mash beans, leaving a bit chunky will be good for the texture.
  4. Remember to finely chop any raw vegetables that you intend to add to the mix.
  5. Adding grains will create a firmer texture, but the grains are not necessary. If you decide to omit grains, you may need to cook the burger a bit longer on lower heat. If your burger is not holding together without the grains, add more beans, or be sure to use psyllium husk/powder.
  6. If using a flax or chia egg, prepare this in a bowl. When the “egg” is ready add all the other ingredients and form it into a patty. If using psyllium husk/powder, add the psyllium along with all the other ingredients and mix well.
  7. You can cook the burger patties on a stovetop (a low heat setting is recommended). Or you can place it in the oven between 350 to 400 degrees Fahrenheit until the desired firmness is reached. (The goal is to dry out and firm up the burger patties while they are cooking.)

Create a G-BOMB meal by including these burger ingredients: Leafy greens, beans, onions, mushrooms, flaxseeds/chia seeds. For dessert, add a berry sorbet and you have covered all of the G-BOMB requirements.

Plant-Based Burger Template: Click here to download/print.

Chocolate Shake (or Frappuccino)

Chocolate Shake (Frappe)

Here is a treat that’s good for your health. A real food, chocolate shake that’s made using whole, plant-based ingredients, and no refined sugars. Just last week in Podcast Episode 27, Patryce and I were talking about ways to create a healthy relationship with food, and during the podcast, I started the discussion about how to create a healthy shake.

Here is what I came up with after looking around online a bit. I found that many recipes use Dandy Blend Herbal Tea mix in many frappuccino-like drinks that usually contain coffee. And guess what? I just happen to have some on-hand.

I used to make an icecream/coffee drink way before I ever became aware of Star Bucks. Yet, by the time I because aware, I was no longer consuming what they put into their drinks. I have to admit, that I’ve never been a Star Bucks fan (too much dairy and sugar and coffee – coffee makes me very nervous/shaky).

But hey, here is one “shake” that I can handle. Since I couldn’t decide between the flavor of coffee or chocolate, I decided to have them both. But, of course, you can make this your own by choosing one or the other if you prefer.

Ingredients:

  • 1 cup of plant-based milk
  • 1/4 cup rolled oats (Added this particular ingredient because of Chef AJ)
  • 1/2 tsp of flax seeds & 1/2 tsp of chia seeds (or 1 tsp of either)
  • 1/2 tsp cinnamon
  • 3-5 drops of Stevia (vanilla flavor) or 1 tsp vanilla powder
  • 1 TBS Dandy Blend Herbal Tea
  • 1 TBS Cacao Powder (or 100% Cocoa Powder)
  • 2 – 3 Mejool dates (or 5/6 Deglet dates)
  • 2 frozen, ripe bananas
  • 1 cup of ice (optional, makes more like a frappuccino)

Directions:

  1. First, I like to blend everything together except for the bananas and ice.
  2. Then once thoroughly blended and smooth, I add the frozen bananas and ice.

Notes:

  1. Using coconut milk/cream will add more calories and fat to this recipe and create a very “rich” shake
  2. The flax seeds and chia seeds add fiber and omega 3s
  3. You can also simply use 2 TB Dandy Blend Herbal Tea or 2 TBS Cacao Powder
  4. Medjool dates have a caramel flavor which I don’t think the deglet date has, but usually, they are a bit smaller so I suggest using a bit extra Deglet dates if those are what you have on-hand.
  5. Instead of using ice, you can freeze some of the plant-based milk in ice cube trays for a bit “stronger” flavored drink.
  6. Uncle Bill D, You can add greens to this shake too. A handful of spinach will be undetectable. (Smile.)

ENJOY! — Shonda

Tofu “Ricotta”

Tofu Ricotta

Here is a plant-based ricotta recipe that you can use in any recipe that calls for ricotta. I like to use this one in this veggie lasagna recipe – even though this tofu is not listed as one of the ingredients. (I’ll update it soon.)

I use a food processor for this recipe, but you can easily place all the ingredients into a bowl and mix with a fork.

Enjoy!

INGREDIENTS:

  • 1 package of very firm tofu, drained (No need to press out the water)
  • 1 TBS lemon juice
  • 2 TBS nutritional yeast
  • 1 tsp salt
  • 1/2 tsp granulated garlic
  • 1/2 tsp onion powder
  • 1 TBS chopped fresh parsley

DIRECTIONS:

  1. Break up the tofu and place it into the food processor.
  2. Add the remaining ingredients.
  3. Pulse

Note: Can also mash by hand.

Warm Cinnamon Apple and Almond Butter Smoothie

Cinnamon Apple Almond Smoothie

Cinnamon apples are definitely a fall delight for the tastebuds. So this warm smoothie hits the spot from fall throughout the winter months.

This one takes a little extra prep work to prepare it just like I prefer it. Even though I use a Vitamix blender, I like to do a bit of the cooking on the stovetop. This is because I like to use banana as a sweetener, but I don’t want to blend a banana in the Vitamix until it becomes steamy. If you do not have a Vitamix (or blender that can handle hot liquids), blend the ingredients first and then warm them on the stovetop.

I hope this smoothies provides a great start to your day. Enjoy!

Tips: Using frozen bananas, you can also use these same ingredients to make a cold smoothie.

INGREDIENTS

  • 1 – 2 bananas, room temperature – unless you want a cold smoothie (or another sweetener of your choice)
  • 1/2 cup applesauce (or 1/2 cup fresh apples that have been stewed on the stovetop using water)
  • 1 cup of water or use plant-based milk for extra creaminess
  • 1 – 2 TBS Almond Butter
  • Dash of cinnamon spice (or any winter spice you like or a combination of more than one)
  • 1 cup of spinach (optional) – I just like to get leafy greens in any way that I can and spinach is hardly noticeable.
  • 1/2 avocado (optional) – Definitely add avocado if you do not use bananas. This will help to thicken the smoothie. If using avocado, I suggest skipping the spinach or the smoothie will be very green.

DIRECTIONS (For a warm smoothie):

  1. Warm the applesauce (apples) and water (or plant-based milk) on the stovetop until you reach a desirable temperature.
  2. Add the warm ingredients to the Vitamix and blend with the remaining ingredients.

Spinach Artichoke Dip

Artichoke Dip

Spinach artichoke dip is expected to be cheesy, right? That’s right, so just because this is a vegan dish made using only plants, doesn’t mean it cannot trick their tastebuds. This dish will convince others, despite there not being any cheese and no trace of nutritional yeast inside of this dish. (Nutritional yeast is the usual ingredient for plant-based recipes that provide the “cheezy” flavors.) Yet, the plant-based yogurt adds tartness and the cashews and potato add the creamy texture.

My husband loves artichokes, so he was my inspiration for trying out this dish. This recipe caught my eye as I was scrolling through some of Nisha’s YouTube (RainbowPlantLife) Videos. Nisha’s recipes have all been wonderful. I’m not a huge fan of artichokes, but this was very tasty and I look forward to making it again.

Also, be sure to check out the nutrition comparison facts below for the REAL details about how this plant-based recipe is low in calories, low in fat and is cholesterol FREE!

More Inspiration:

There are so many more ways you can use this recipe to create new dishes. See the video at the bottom of this post to see the steps and two additional ways I used this dip.

INGREDIENTS

  • 1/2 cup yellow onion, finely chopped
  • 3 large garlic cloves, minced
  • 10 ounces fresh spinach, chopped
  • 12 to 14 ounces of artichokes (can or jar), marinated (or not)
  • 1 cup plain, unsweetened dairy-free yogurt (unsweetened coconut yogurt will make for the creamiest, but I used HEB almond yogurt the first time I made this and it was good.)
  • 1 1/2 TBSP cooking wine (Or even rice vinegar. I used a bit of both. The original recipe used distilled vinegar.)
  • 1/2 cup raw, unsalted cashews (soak in warm water if not using a high-speed blender)
  • 1/2 tsp fine salt (may require less if using marinated artichokes)
  • 1/4 to 1/2 tsp ground black pepper
  • 1/2 packed cup cooked, peeled gold potato
  • OPTIONAL: red pepper flakes, for garnish, pita chips or veggies for serving

DIRECTIONS

  1. Preheat the oven to 375 F (190 C).
  2. Add the onion, garlic, and 5 TBSP (]water to a small pan over medium-low heat. Bring to a simmer, and cook 5 to 8 minutes or until tender, stirring occasionally.
  3. The original recipe says to add the spinach to the pan in small batches, stirring and tossing the spinach until it is well cooked and wilted before adding the next batch. Repeat until all the spinach is cooked well. This will take about 10 minutes. Turn the heat off. But, since I chopped the spinach using the pulse function of the food processor, I added all to the pan at once and stirred only a few minutes to allow it to wilt. Then I turned off the heat.
  4. The original recipe says to roughly chop the artichokes into quarters. But my artichokes were already quartered and I put them into the food processor to chop even more. This will release lots of liquid, so drain the excess. Squeeze out the excess liquid so it doesn’t end up watery. I used a fine strainer and pressed the artichokes into the strainer using the back of a spoon. Add the artichokes to the cooked spinach mixture, and set aside.
  5. Add the yogurt, vinegar/wine, cashews (soaked if necessary), salt, and pepper to a high-powered blender or food processor. Starting slowly, blend the ingredients. Add the potato also to the blender, blend on high until completely. smooth. Scrape the sides if needed, and blend once more. Pour over the spinach and artichoke mixture and stir to combine well.
  6. Pour the mixture into a 9-inch cast-iron skillet, pie dish, or an 8-inch square baking dish. Bake uncovered for 25 minutes or until the top looks firm and set and is bubbly. Let cool for 5 to 10 minutes. For a kick, add some red pepper flakes on top before serving with pita chips or veggies.

NOTES/TIPS

  • A food processor will make this an easy and quick recipe. I used one to chop and mince onions before cooking. I also used it to chop the artichokes and to chop the spinach (each chopped separately).
  • Look for organic potatoes to avoid pesticides.
  • As always, don’t forget to taste your dish prior to calling it “done” (of course, before baking it)
  • I based this recipe on the one I found at https://youtu.be/_w4YMgSROd4?t=366 (Nisha is one of my favorite vegan/plant-based YouTubers)

NUTRITION COMPARISON FACTS: